Shooting for the edit: coverage, B-roll and the shots editors need
Shooting for the edit means giving your editor options: a master shot, several shot sizes, B-roll, inserts and reaction shots. Here are clear definitions, two real-world examples, a shot list method, an on-set checklist and the mistakes that make editing harder.
MoBenFreelance video creator
Contents
- Why the edit starts on set
- What is camera coverage?
- The master shot: the backbone of the scene
- B-roll: definition and role in the edit
- Insert, cutaway, reaction shot: what’s the difference?
- Vary your shots to control pacing
- Two concrete examples: an interview and a video ad
- Build a shot list: shoot more, but not just anything
- On-set checklist: what to check before you wrap
- Mistakes that make editing harder
- Key takeaways
- FAQ
Shooting for the edit means filming with the timeline already in mind: a master shot that sets up the scene, several angles and shot sizes (your coverage), B-roll, inserts and reaction shots. With that material, the editor can cut wherever they need to, tighten the pacing and hide mistakes. The goal isn’t more footage. It’s more useful options.
This guide gives you a clear definition of each shot type, two concrete examples (an interview and a video ad), a shot list method, a checklist to run before you leave the set and the mistakes that make editing harder.
Why the edit starts on set
In the edit, you can only use what was filmed. If a scene exists as one locked-off shot, every hesitation, every overlong sentence and every clumsy gesture stays on screen or turns into a jump cut. Before you hit record, ask one simple question: what will this shot be used for in the edit? A shot can:
- show the location and who is there;
- make the action easy to follow;
- reveal an emotion;
- hide a cut in a conversation;
- speed up or slow down a sequence;
- illustrate what is being said;
- bridge to the next idea.
A shot that does none of these just fills your memory card. A scene shot with these jobs in mind is faster to cut and ends up smoother on screen.
What is camera coverage?
Coverage is the full set of shots you film so a scene can be built in the edit: the same action recorded from several angles and at several shot sizes. StudioBinder’s guide to film coverage defines it as the total amount of footage needed to communicate the visual language of a scene, and points out that missing coverage usually means a reshoot.
The classic approach is to start wide and move in, changing angles as you go; StudioBinder calls it the “V” strategy. For a simple scene, basic coverage includes:
- a wide shot or master shot;
- a medium shot (waist or chest up);
- a close-up on the face;
- a reverse or over-the-shoulder shot when two people talk;
- inserts of hands, objects or screens;
- reaction shots;
- a few atmosphere shots of the location.
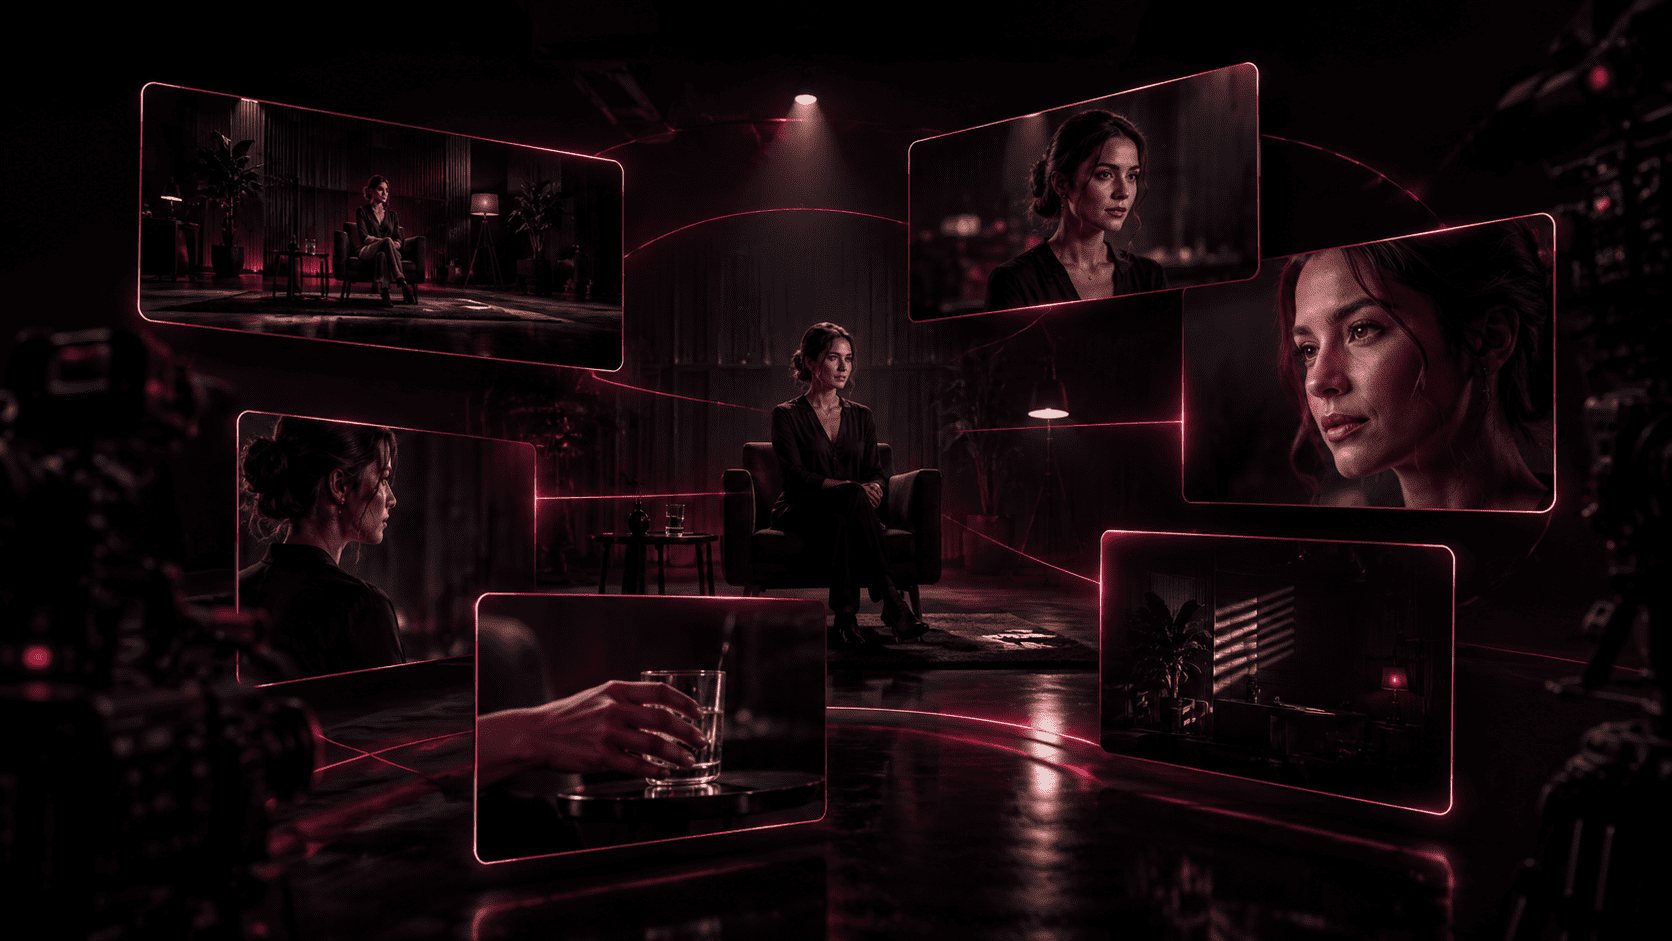
Example: someone is reading a book. Filmed only as a static seated shot, the scene goes nowhere. Add a close-up of the pages, hands turning a page, the eyes, the light on the table and a slow push-in on the face, and you can now slow the scene down, speed it up, hide a cut or build a mood.
The master shot: the backbone of the scene
A master shot records all the action of a scene in a single take, usually as a wide or long shot. Adobe’s guide to the master shot describes it as basic coverage: editors can cut back to it during pauses in action or dialogue to let the scene breathe, and it doubles as a safety net for continuity.
In practice, roll the master from the start of the scene to the end, even if you know only a few seconds will survive. It shows where we are, who is there and how people move. It’s also your fallback: if a close-up is soft or a line is missing from another angle, the master often saves the cut.
A master on its own isn’t enough, though. It gives you structure; the other shots bring pacing, emotion and precision.
B-roll: definition and role in the edit
B-roll is the supplementary footage that supports your main footage, the A-roll (for example, someone talking to camera). Adobe’s page on B-roll traces the term back to early film, when editors inserted supplementary footage into the main reel to hide the visible lines where two pieces of film were spliced. Adobe lists establishing shots, cutaways and close-ups among the most common types.
Adobe gives B-roll three main jobs: establishing a scene (place and time), smoothing a transition and covering an edit, such as a jump cut or a gap in the audio. B-roll you can plan for easily:
- hands at work, a precise gesture;
- details of a product, a material, a tool;
- the location: storefront, sign, room, exterior;
- the team in action, behind the scenes;
- a computer or phone screen tied to what is being said;
- a texture, a reflection, moving light.

Adobe recommends planning B-roll in pre-production with a shot list, noting in the script where establishing shots, cutaways and close-ups could work. In the edit, that B-roll keeps the video from relying only on a talking head, illustrates every key idea and lets you cut inside a speech without the cut showing.
Insert, cutaway, reaction shot: what’s the difference?
These three shots are often confused, yet each does a different job in the edit.
The insert shot
An insert is a shot, usually tight, whose sole purpose is to draw attention to a detail within the scene: text to read, an object, a gesture. StudioBinder’s guide to insert shots notes that it is often framed from a character’s point of view. An insert stays inside the action: we see the hand signing the contract being discussed.
The cutaway
A cutaway briefly leaves the main action to show something else in the space, an object or a location, before returning to it. That’s how Adobe’s guide to cutaway shots defines it. For the editor, it’s the ideal tool to shorten an answer or suggest that time has passed without a continuity error.
The reaction shot
A reaction shot shows how another person responds to what was just said or done: a smile, a nod, a surprised look. StudioBinder’s breakdown of the reaction shot stresses that it steers the audience’s emotions and gives you flexibility with pacing. In an interview, a few seconds of the interviewer listening is often enough to hide a cut.
These three shots are the foundation of invisible editing: every cut lands on a shot that has a reason to be there, so the viewer never notices it.
Vary your shots to control pacing
Pacing depends directly on the material you have. With only long takes, you can’t build a dynamic edit. With only close-ups, viewers lose context. Without details, the cuts show. Without atmosphere shots, the video feels cold. Each shot size has its job:
- wide shots to set the scene;
- medium shots to follow the action;
- close-ups for emotion;
- inserts for detail;
- B-roll to illustrate and enrich;
- reaction shots for the human element;
- transition shots (a door opening, someone walking, an object set down) to move from one idea to the next.
That matters even more for formats built to hold attention: Reels, TikTok, Shorts, ads, VSLs. Being able to change shots when the content calls for it, without random jump cuts, is one of the main levers of video retention.
Shooting in 4K UHD (3840 × 2160) for a 1080p delivery also gives you room to reframe: a 2x digital punch-in still holds Full HD resolution. It’s handy for faking a second angle, but it doesn’t replace a real change of angle, which changes the perspective and the background.
Two concrete examples: an interview and a video ad
Shooting an interview
With one camera and one frame, an interview quickly feels flat. To give the edit options, plan for:
- a main shot facing the camera or at three-quarters;
- a tighter second angle (a second camera, or a change of shot size between questions);
- shots of hands and gestures;
- listening and reaction shots of the interviewer;
- shots of the location and of objects tied to the topic;
- B-roll that illustrates the answers, filmed after the interview based on what was said.
In the edit, you can then tighten the answers, make the message more credible and pull short clips for Instagram, TikTok, YouTube Shorts or LinkedIn.
Shooting a video ad
For an ad, don’t just film the product sitting on a table. Also plan for:
- the product in use, in a real-life scene;
- extreme close-ups of details and materials;
- a hand picking up or handling the product;
- the packaging and the unboxing;
- a reaction from the person using it;
- a lifestyle shot that shows the context;
- a before/after shot if the product lends itself to one;
- a clean end shot with space for the logo and the CTA.
These shots let you adapt the same campaign to 16:9, 1:1 and 9:16 for Stories, Reels and ads. If you shoot 4K UHD and also deliver vertical, a full-height 9:16 crop gives you about 1215 × 2160 pixels, more than the 1080 × 1920 you need. Keep the subject near the center of the frame and leave room for text by respecting the safe zone on Reels, TikTok and Shorts.
Build a shot list: shoot more, but not just anything
Shooting options doesn’t mean filming at random for hours: piles of useless footage slow down logging and selects. Before the shoot, answer these questions:
- what is the core message;
- which scenes are essential;
- which formats will be delivered (16:9, 9:16, 1:1);
- where captions and on-screen text will sit;
- which shots will feed the social media cutdowns.
Then write your shot list. StudioBinder defines it as an organized list of shots that sequence together into scenes, and walks through how to make a shot list in 8 steps. For each shot, note at least:
- the scene and shot number;
- a short description of the action;
- the shot size (wide, medium, close-up, insert);
- the camera angle and movement;
- the gear or lens required;
- the sound to record;
- a “done” box and notes (best take, issues).

For every scene, keep the same order: master shot, mediums, close-ups, inserts, reactions, B-roll, transitions, then 30 to 60 seconds of room tone. Then group the shots by camera and lighting position so you don’t rig the same light three times. StudioBinder’s shot list software, for example, lets you group shots into setups, view them as a storyboard and add up time estimates to plan the day.
If you’d rather hand off this prep, a video production service builds the shot list from your message and the formats to deliver, before the first shoot day.
On-set checklist: what to check before you wrap
Before you pack up, run through this list. Every “no” is a problem the editor will have to work around.
- Does every scene have a wide shot or a complete master shot?
- Do you have medium shots to follow the action?
- Do you have close-ups for emotion and key details?
- Do you have inserts of the hands, objects and screens being discussed?
- Do you have reaction and listening shots?
- Do you have enough B-roll to illustrate every key idea?
- Do you have cutaways to hide cuts in the dialogue?
- Did you leave a few seconds before and after every action?
- Does the framing also work vertically if the video will be cut to 9:16?
- Is there room left for captions and on-screen text?
- Did you record room tone in every location?
- Did you film a clean end shot you can use for the CTA?
If you answer no to several of these, shoot the missing shots while you’re still there: coming back later almost always costs more than an extra fifteen minutes on set.
Mistakes that make editing harder
- Cutting too early. Starting to record at the last second or stopping as soon as the line ends leaves the editor no handles for transitions. Wistia recommends leaving a silent buffer of about 3 seconds at the start and end of each clip.
- B-roll shots that are too short. A 2-second shot that wobbles at both ends is often unusable. Hold each B-roll shot for several seconds once the frame is steady (5 to 10 seconds is a good habit).
- Constant zooming or panning. A move should start and end on a steady frame, or it’s hard to cut. Shoot a locked-off version of the same shot too.
- Skipping the master or the wide shot. Without a shot that establishes the scene, viewers can’t read the space and the editor has no fallback.
- Crossing the line. If the camera jumps to the other side of the imaginary line between two people, they seem to swap places on screen. The 180-degree rule, covered in StudioBinder’s coverage guide, prevents this.
- Letting continuity errors slide. A full glass then an empty one, left hand then right hand, jacket open then closed: track continuity between takes, or the shots won’t cut together.
- Mismatched camera settings. Different frame rates, white balance or color profiles complicate multicam editing and color grading. Lock them before the first take.
- Neglecting sound. No mic close to the subject, no slate or clap for sync, no room tone: each one becomes a repair job in post-production.
- Taking no notes. Without markers for the best takes, the editor has to rewatch everything. Tick the good takes on the shot list or call them out loud before you cut.
When the material is complete, editing and post-production can focus on story and pacing instead of rescuing footage.
Filming a podcast or an interview? The guide to video podcast workflow and clips explains how to prepare the shoot to make the edit easier.
Key takeaways
- Shooting for the edit means filming options: angles, shot sizes, details and reactions.
- The master shot gives you structure; coverage gives you the freedom to cut.
- B-roll, inserts and cutaways illustrate, hide cuts and control pacing.
- A shot list built from the message and the delivery formats keeps useless footage to a minimum.
- Before you wrap, run the checklist: handles, room tone, vertical framing, end shot.
FAQ
What is the difference between A-roll and B-roll?
A-roll is your main footage: the person speaking, the interview, the central action that carries the story. B-roll is the supplementary footage that supports it: the location, hands, objects, behind the scenes. In the edit, you usually keep the A-roll audio and lay B-roll over it to illustrate the message, cover a cut or vary the pacing without interrupting the speaker.
What is the difference between an insert and a cutaway?
An insert stays inside the scene: it’s a tight shot of a detail in the action, like the hand signing or the screen a character is looking at. A cutaway briefly leaves the main action to show something else, a location or an object, before returning to the scene. Both help hide a cut, but an insert clarifies the action while a cutaway adds information or suggests time passing.
How much B-roll should you shoot for a video?
There is no official ratio. A practical rule: at least one B-roll shot for every key idea in the script and for every point where you might cut, with a few variations (wide, tight, moving). Hold each shot for several seconds once the frame is steady. Fifteen useful, varied shots beat a hundred random ones that slow down logging.
Can you shoot an interview with only one camera?
Yes, as long as you build the coverage yourself. Change the shot size between questions (medium close-up, then close-up), repeat an important question in a different frame if needed, then film the interviewer listening and reacting after the interview. Add B-roll tied to the answers and shots of the location, and the editor will be able to cut without visible jump cuts.
Go further